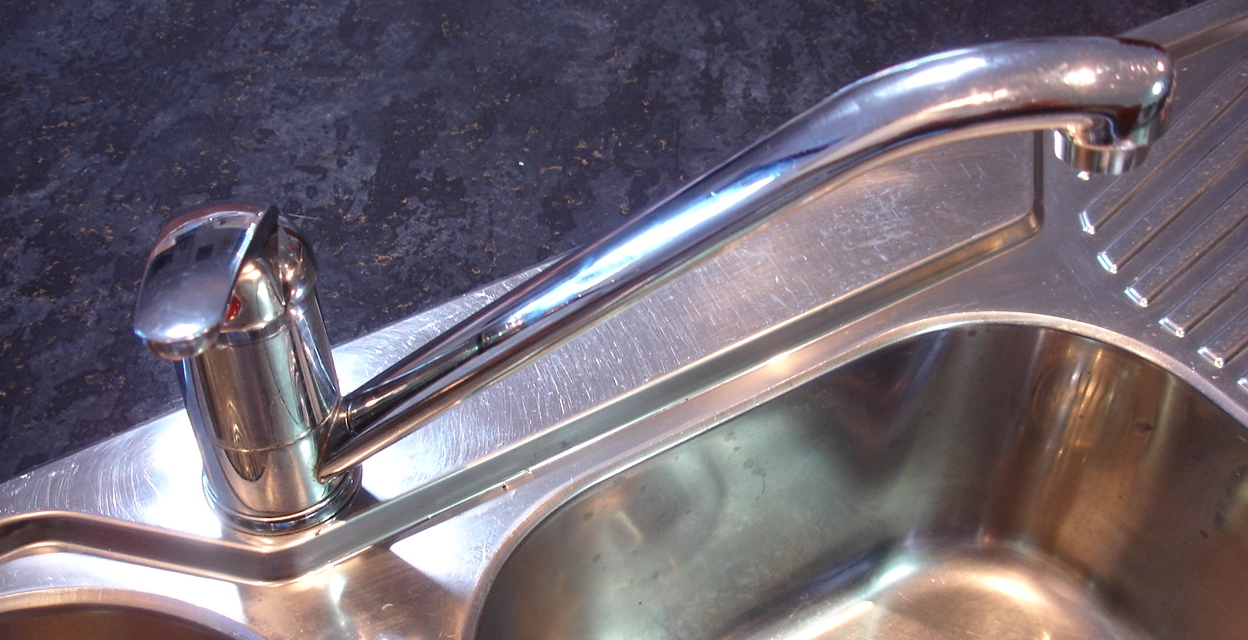
Got a sink mixer that leaks or a mixer handle that doesn’t want to move anymore? Heard you can replace your mixer cartridge but you don’t know which one to get? Not sure what you’d do with a new one anyway? Follow these steps to rejuvenate your mixer.
The surest way to buy the right thing is to take a sample with you when you go shopping. The following pictures will show you how to get your old cartridge out of your mixer so you can come home with the right one.
You’ll need some tools; a Stanley knife and a small flat blade screwdriver, pipe wrench, 12″ shifter, 2.5mm hex key (or 3.0mm hex key depending).
The first step is to isolate water to the mixer tap or you’ll have a minor flood to deal with before you get to the end of these instructions. Remove the plug that conceals the grub screw. I needed to use a blade to lift the button and then I needed a small screwdriver to finish prising it out.
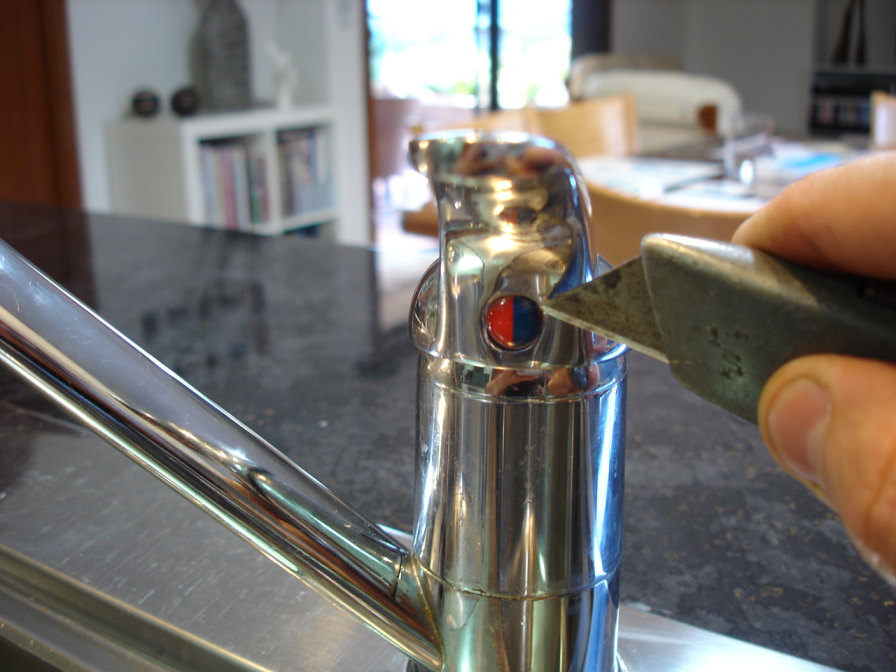
Prise the button out of the mixer handle.
When you look straight into the hole in your mixer handle you’ll see a grub screw.
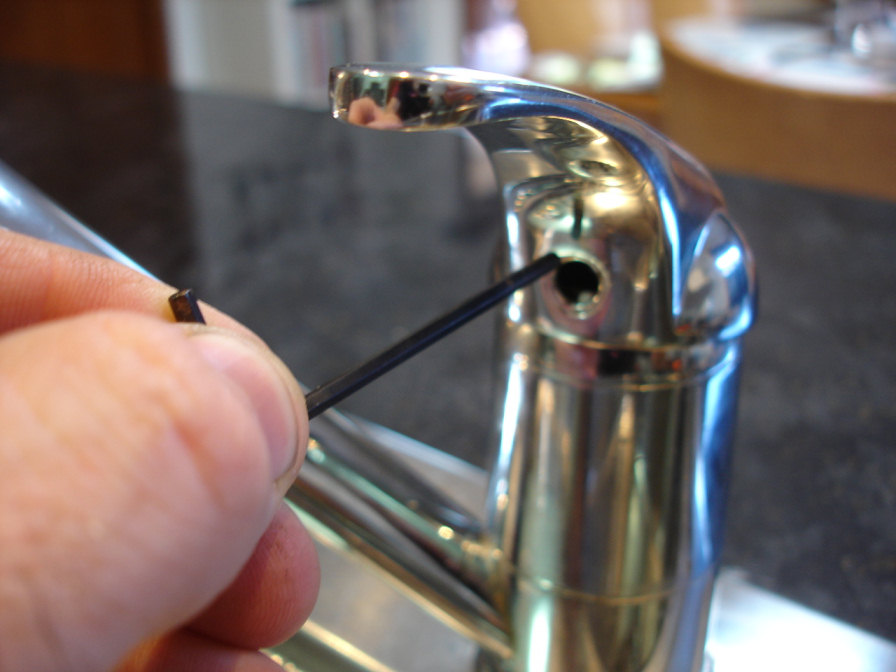
Use the appropriate size hex key to undo the grub screw.
Undo the grub screw enough to allow you to lift the handle straight off the cartridge spindle. This part of the procedure is the most likely part to not go smoothly. Getting the handle off can be so difficult that you end up needing to replace the entire mixer because you simply can’t get to the cartridge. The best chance you will have of unseizing a seized mixer handle is vinegar. I think calcium carbonate is the white residue that develops on the cartridge spindle and seizes the handle on. Anyway, whatever it is, vinegar dissolves it and the handle can come off. You’ll have to be creative in order to get vinegar in there, but once you do, there’s a good chance that your handle will come off in 20 minutes or so.
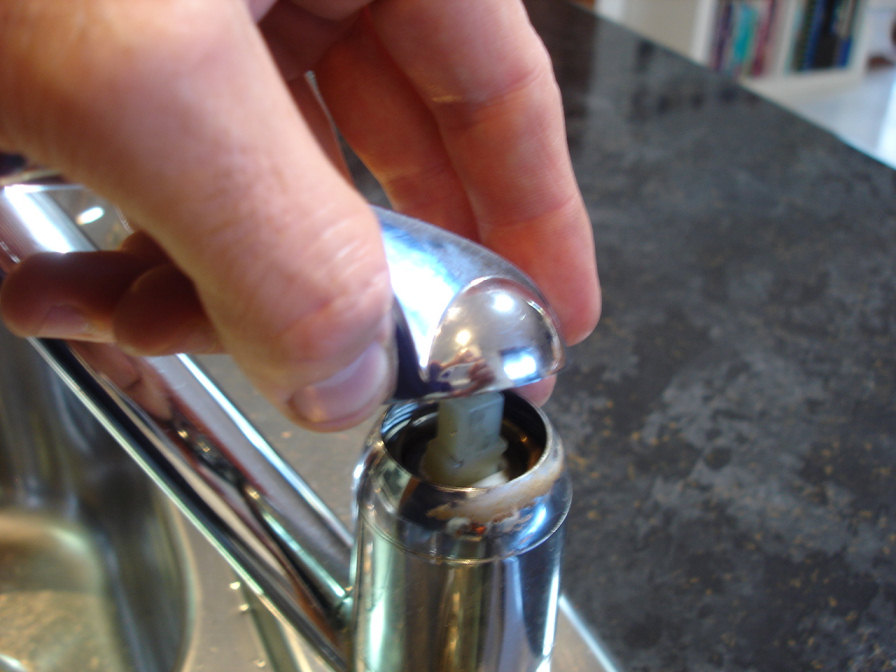
Lift the handle straight up (perpendicular) away from the base of the mixer.
The next piece is a chrome dress ring. There’s no flats on this one and it wouldn’t come off by hand so I used a pipe wrench.
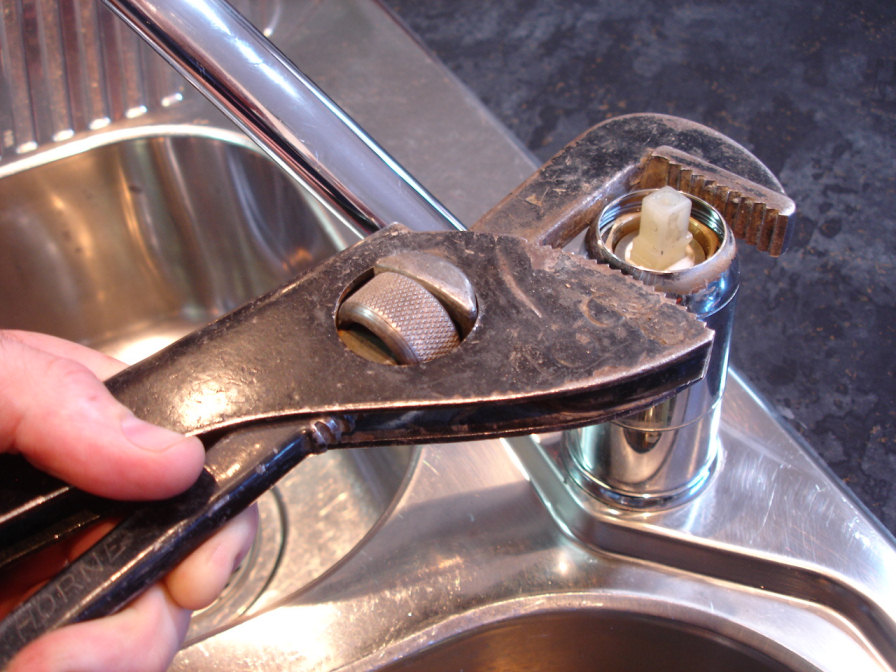
Spin the dress ring off the mixer.
Under the dress ring is the retaining nut. Use a spanner to unscrew it and remove it.
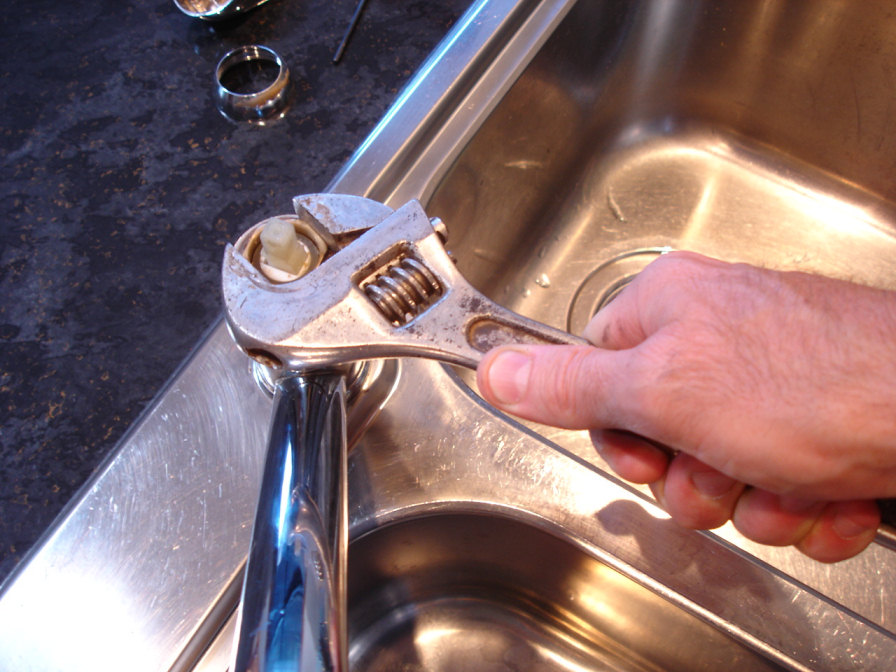
12″ spanner should do the trick.
Off comes the retaining nut.
Once unscrewed, the retaining nut will lift out of the way.
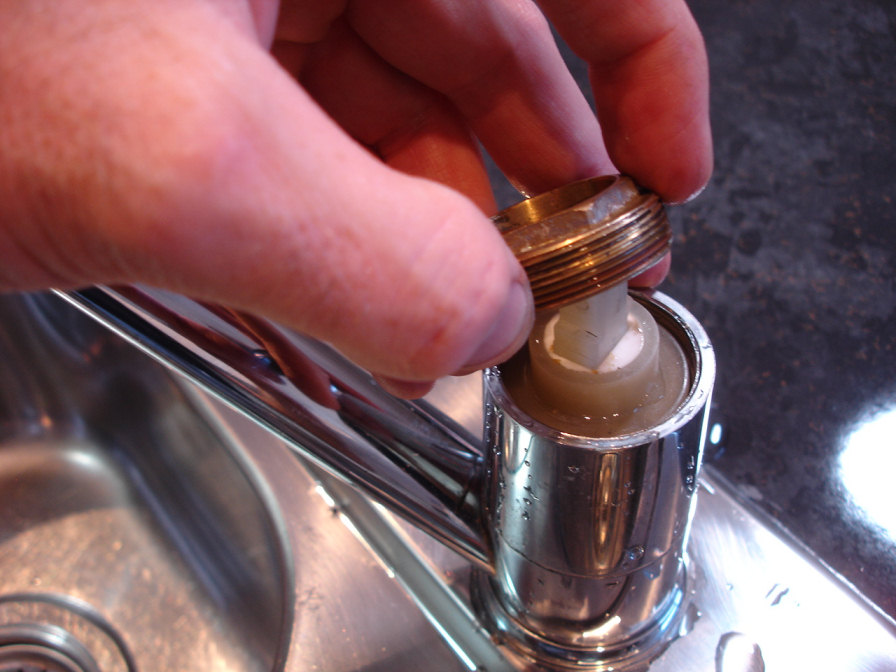
Under the retaining nut is the mixer cartridge.
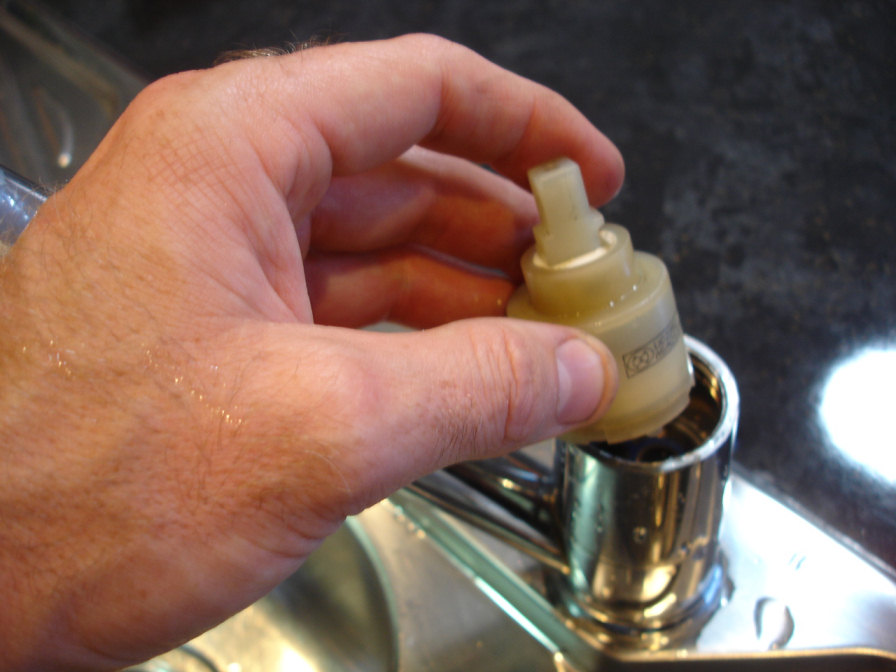
The mixer cartridge will lift straight out.
If this article has helped you, please do me a favour and to the bottom of the page and click like, or share this article with your friends. I’d be stoked if you would like my facebook page and say hello or do the same at my Google+ page.
Now you have your cartridge sample so you can get the right replacement part. Common, generic cartridges come in two sizes (35mm and 40mm), and two configurations (flat or raised). Hopefully your mixer has one of these in it, otherwise you will need to order a proprietary cartridge from the tapware manufacturer.
Once you source the replacement cartridge, put the mixer back together reversing the order above.
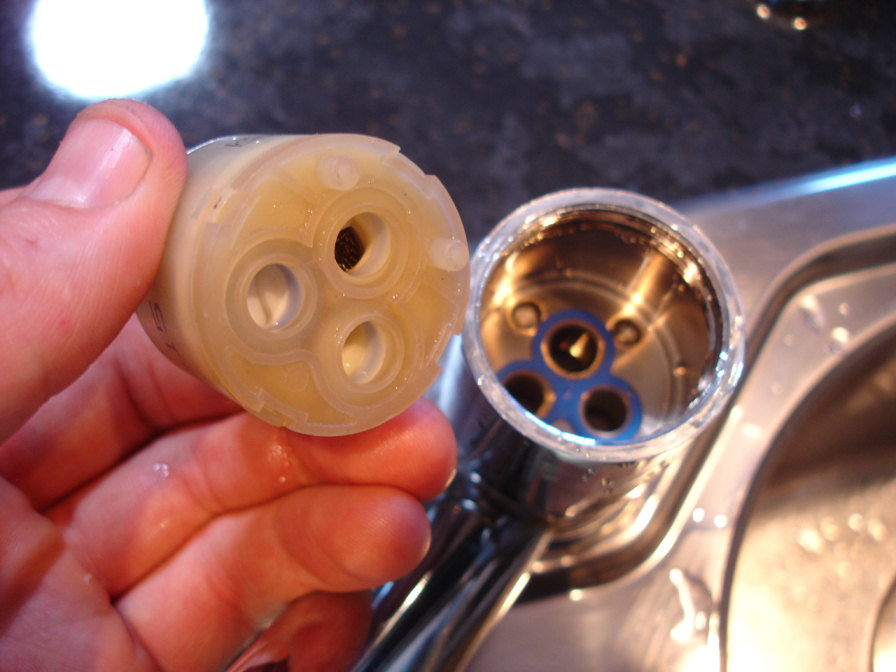
The two pins will need to line up with alignment holes in the base of the mixer body.
You might have forgotten to turn your water off before you started but you’ll soon remember to turn it back on when you’re finished. If the only problem with your mixer was the cartridge and you’ve done everything right, you’ll enjoy the improvement to the busiest tap in the house.
Drop a like on my facebook page or follow my instagram if this has been helpful 😎